In the final post of this series, we will build out the UI for this Blog site built with Next.js, Prisma 2 and Docker. Be sure to check out the first two posts to make sure you are caught up first.
Where's the code?
We have the final code posted over on Github.
#Table of Contents:
Part I- Set up the Repo and Configure the Backend
-
Create the base repo
-
Create the Next.js frontend
-
Create the boilerplate Prisma 2 backend
-
Dockerize our web app
a. Create a docker-compose file
b. Add Dockerfiles for each container
-
Configure the backend
a. Switch database from SQLite to MySQL
b. Remove unused backend boilerplate code
c. Update backend queries in Prisma Nexus
-
Verify our Docker-Compose cluster works
Part II- Configure the Frontend
- Add GraphQL fragments, queries and resolvers
- Add GraphQL-Codegen for generating React Components
- Add Apollo and create HOC for Next.js
- Add React-Apollo to project root
- Install Antd for a beautiful site layout
Part III- Build the UI (this post)
- Create the Main Layout
- Create a Users Layout Component
- Create a Signup User Component
- Create a Feed Layout Component
- Create a New Draft Component
- Create a Publish Draft Button Component
- Create a Delete Post Button Component
As always, make sure to check out the end for video walkthroughs.
Part III- Build the UI
1. Create the main layout
Our first step of our UI journey is to create a layout component that we will load on every page. This will contain the header, footer and a passthrough for the rest of the page. Create a main layout file and add the following code:
frontend/components/main-layout.tsx
import React, { ReactNode, Component } from 'react'
import { Layout } from 'antd'
import Link from 'next/link'
import Head from 'next/head'

const { Footer, Header, Content } = Layout

type Props = {
  title?: string
  children: ReactNode
}

class MainLayout extends Component<Props> {
  render() {
    const { children, title } = this.props
    return (
      <Layout>
        <Head>
          <title>{title}</title>
          <meta charSet="utf-8" />
          <meta
            name="viewport"
            content="initial-scale=1.0, width=device-width"
          />
        </Head>
        <Header>
          <nav>
            <Link href="/">
              <a>Home</a>
            </Link>
          </nav>
        </Header>
        <Content>{children}</Content>
        <Footer>
          <hr />
          <span>I'm here to stay (Footer)</span>
        </Footer>
      </Layout>
    )
  }
}

export default MainLayout
Update the index page to add the Layout component. You'll need to add this Layout on every page you make in the future, but in our case we only have the one:
frontend/pages/index.tsx
import * as React from 'react'
import { NextPage } from 'next'
import Layout from '../components/main-layout'

const IndexPage: NextPage = () => {
  return (
    <Layout title="Blog Layout">
      <h1>Simple Prisma 2 Blog Example</h1>
    </Layout>
  )
}

export default IndexPage
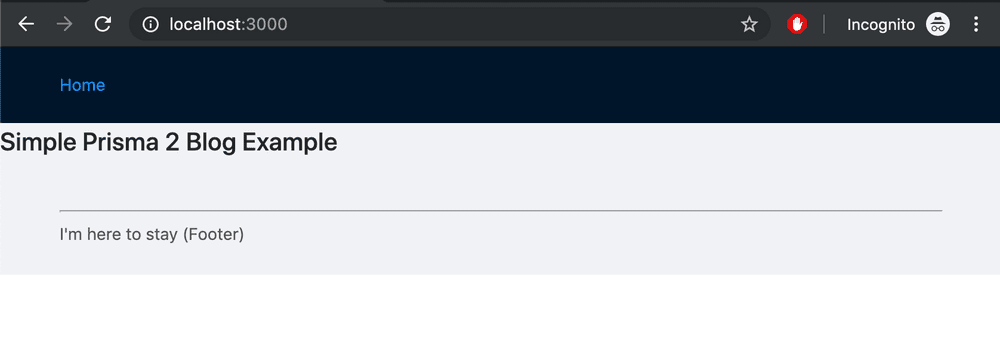
When you reload your page, it should have a header, footer and the body should be a gray color:
2. Create a Users Layout Component
Now that we have Ant Design installed, Apollo configured and our Apollo components autogenerated, it is time to get started making our components. Let's start with a users layout.
frontend/components/users.tsx
import React from 'react'
import { Table } from 'antd'
import { UsersQueryComponent } from '../generated/apollo-components'

type Props = {}

class UsersList extends React.PureComponent<Props> {
  render() {
    return (
      <UsersQueryComponent>
        {({ loading, error, data }) => {
          if (loading) return <p>Loading...</p>
          if (error) return <p>Error</p>

          if (data && 'users' in data && data.users.length > 0) {
            const feedData = data.users.map(({ name, email }, i) => ({
              key: i,
              name,
              email,
            }))
            const columns = [
              {
                title: 'Name',
                dataIndex: 'name',
                key: 'name',
              },
              {
                title: 'Email',
                dataIndex: 'email',
                key: 'email',
              },
            ]
            return <Table columns={columns} dataSource={feedData} />
          }

          return <p>No users yet.</p>
        }}
      </UsersQueryComponent>
    )
  }
}

export default UsersList
We are using an autogenerated component that is called UsersQueryComponent that was made by the GraphQL Codegen plugin. It is doing all the hard work of fetching our data. We first check that it isn't loading and there isn't an error and then we pull off a list of users from the data object.
Antd has a table component that we can feed it an array of objects and a list of column names and it will create a beautiful table for us. If there aren't any users we just report that back instead.
Now we can import that UsersList component into our index.tsx file:
frontend/pages/index.tsx
import * as React from 'react'
import { NextPage } from 'next'
import Layout from '../components/main-layout'
import UsersList from '../components/users'

const IndexPage: NextPage = () => {
  return (
    <Layout title="Blog Layout">
      <h1>Simple Prisma 2 Blog Example</h1>
      <h3>Users List</h3>
      <UsersList />
    </Layout>
  )
}

export default IndexPage
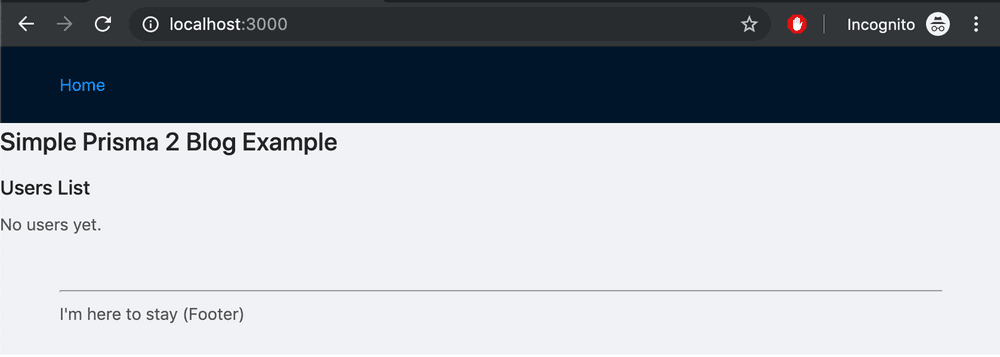
When we look at our webpage now, we should see that it is saying that we don't have any users yet. Let's change that now by creating a signup user component.
3. Create a Signup User Component
Let's create a new file called signup-user.tsx and add the following code:
frontend/components/signup-user.tsx
import React from 'react'
import { Row, Col, Button, Form, Input } from 'antd'
import {
  SignupUserMutationComponent,
  UsersQueryDocument,
} from '../generated/apollo-components'

type Props = {}
const initialState = { name: '', email: '' }
type State = typeof initialState

class SignupUser extends React.Component<Props> {
  state: State = initialState

  handleChange = (event: React.ChangeEvent<HTMLInputElement>) => {
    const { name, value } = event.target
    this.setState({ [name]: value })
  }

  render() {
    return (
      <SignupUserMutationComponent>
        {createUser => (
          <Form
            onSubmit={e => {
              e.preventDefault()
              createUser({
                variables: { ...this.state },
                refetchQueries: [{ query: UsersQueryDocument }],
              }).then(() => {
                this.setState({ name: '', email: '' })
              })
            }}
          >
            <Row>
              <Col span={6}>
                <Form.Item>
                  <Input
                    placeholder="name"
                    name="name"
                    value={this.state.name}
                    onChange={this.handleChange}
                    type="text"
                  />
                </Form.Item>
              </Col>
              <Col span={6}>
                <Form.Item>
                  <Input
                    placeholder="email"
                    name="email"
                    value={this.state.email}
                    onChange={this.handleChange}
                    type="text"
                  />
                </Form.Item>
              </Col>
              <Col span={6}>
                <Form.Item>
                  <Button htmlType="submit">Signup User</Button>
                </Form.Item>
              </Col>
            </Row>
          </Form>
        )}
      </SignupUserMutationComponent>
    )
  }
}

export default SignupUser
We are using a different autogenerated component called SignupUserMutationComponent to trigger our signupUser mutation. The SignupUserMutationComponent yields a method that we call createUser here which allows us to trigger a mutation wherever we'd like. We can pass variables into this method when we call it and they will get added to our request for the backend.
We create an HTML form with several inputs- name and email. We use the SignupUser state to save the input as the user types into the two input fields. Since the input fields display the current state of the react component, the user isn't directly typing into the field but instead is triggering an onClick trigger which is updating the state which we then see reflected in the input field.
When the user presses the submit button, we use an onSubmit trigger to fire off the createUser method which we populate with variables from the state.
After the mutation fires off we have a refetchQuery which will re-run the users query to make sure that our UsersList will have the new user's entry that was just added. Finally, we clear the state variables name and email which will clear out the input fields. This approach is called controlled components in React and is a pretty standard way of doing things, so if it is unfamiliar to you, check out the official documentation for more details (or feel free to reach out directly to me for this or other issues for possible future blog posts!).
Now you can add the SignupUser component to the index page:
frontend/pages/index.tsx
import * as React from 'react'
import { NextPage } from 'next'
import Layout from '../components/main-layout'
import UsersList from '../components/users'
import SignupUser from '../components/signup-user'

const IndexPage: NextPage = () => {
  return (
    <Layout title="Blog Layout">
      <h1>Simple Prisma 2 Blog Example</h1>
      <h3>Signup User</h3>
      <SignupUser />
      <h3>Users List</h3>
      <UsersList />
    </Layout>
  )
}

export default IndexPage
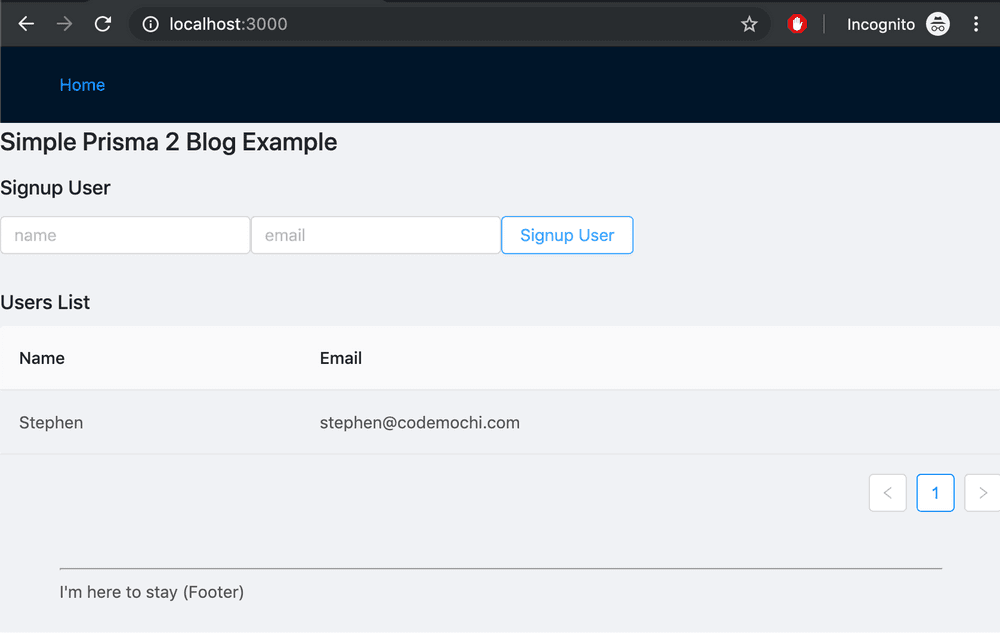
Now go back to the Next.js website and try adding a new user and email. You should see that it gets added to the users list just like this:
4. Create a Feed Layout Component
Our blog page will use the Feed Layout twice:
- all the published blog posts
- all the hidden blog posts
We want to create a FeedList component so that we can display either one based on whether the published boolean that we pass in is true or false.
Create a feed.tsx file and add the following code:
frontend/components/feed.tsx
import React from 'react'
import { Table } from 'antd'
import { FeedQueryComponent } from '../generated/apollo-components'

type Props = {
  published: boolean
}

class FeedList extends React.PureComponent<Props> {
  render() {
    const { published } = this.props
    return (
      <FeedQueryComponent variables={{ published }}>
        {({ loading, error, data }) => {
          if (loading) return <p>Loading...</p>
          if (error) return <p>Error</p>

          if (data && 'feed' in data && data.feed.length > 0) {
            const feedData = data.feed.map(({ id, title, content }, i) => ({
              key: i,
              title,
              content,
              id,
            }))
            const columns = [
              {
                title: 'Title',
                dataIndex: 'title',
                key: 'title',
              },
              {
                title: 'Content',
                dataIndex: 'content',
                key: 'content',
              },
              {
                title: 'Action',
                key: 'action',
                render: () => {
                  return <p>Button Group will go here</p>
                },
              },
            ]
            return <Table columns={columns} dataSource={feedData} />
          }

          return <p>No results yet.</p>
        }}
      </FeedQueryComponent>
    )
  }
}

export default FeedList
The FeedList component looks very similar to the Users component that we already created. We are utilizing the FeedQueryComponent that is autogenerated just like before and now we are going to create a table with 3 columns- title, content and action. The action group will have our buttons for publishing and deleting the posts but we have just stubbed those out for now.
Now modify the index.tsx file in the pages folder to have two instances of the FeedList component- once with the published prop set to true and the second time set to false.
frontend/pages/index.tsx
import * as React from 'react'
import { NextPage } from 'next'
import Layout from '../components/main-layout'
import FeedList from '../components/feed'
import UsersList from '../components/users'
import SignupUser from '../components/signup-user'

const IndexPage: NextPage = () => {
  return (
    <Layout title="Blog Layout">
      <h1>Simple Prisma 2 Blog Example</h1>
      <h3>Create User</h3>
      <SignupUser />
      <h3>Users</h3>
      <UsersList />

      <h3>Feed</h3>
      <FeedList published={true} />
      <h3>Hidden Feed</h3>
      <FeedList published={false} />
    </Layout>
  )
}

export default IndexPage
Now navigate to the Next.js webpage and you should see that it has both Feed components.

5. Create a New Draft Component
Now we will create a New Draft Component so we can make new blog posts. This will be very similar to the SignupUser component that we have already made. The goal here is that when the draft is created, we will see it show up on the unpublished list.
Create a new-draft.tsx file and add the following code:
/frontend/components/new-draft.tsx
import React from 'react'
import { Row, Col, Button, Form, Input } from 'antd'
import {
  CreateDraftMutationComponent,
  FeedQueryDocument,
} from '../generated/apollo-components'

type Props = {}
const initialState = { title: '', content: '', authorEmail: '' }
type State = typeof initialState

class NewDraft extends React.Component<Props> {
  state: State = initialState

  handleChange = (event: React.ChangeEvent<HTMLInputElement>) => {
    const { name, value } = event.target
    this.setState({ [name]: value })
  }

  render() {
    return (
      <CreateDraftMutationComponent>
        {createDraft => (
          <Form
            onSubmit={e => {
              e.preventDefault()
              createDraft({
                variables: { ...this.state },
                refetchQueries: [
                  { query: FeedQueryDocument, variables: { published: true } },
                  { query: FeedQueryDocument, variables: { published: false } },
                ],
              }).then(res => {
                console.log(res)
                this.setState({ title: '', content: '', authorEmail: '' })
              })
            }}
          >
            <Row>
              <Col span={6}>
                <Form.Item>
                  <Input
                    placeholder="title"
                    name="title"
                    value={this.state.title}
                    onChange={this.handleChange}
                    type="text"
                  />
                </Form.Item>
              </Col>
              <Col span={6}>
                <Form.Item>
                  <Input
                    placeholder="content"
                    name="content"
                    value={this.state.content}
                    onChange={this.handleChange}
                    type="text"
                  />
                </Form.Item>
              </Col>
              <Col span={6}>
                <Form.Item>
                  <Input
                    placeholder="authorEmail"
                    name="authorEmail"
                    value={this.state.authorEmail}
                    onChange={this.handleChange}
                    type="text"
                  />
                </Form.Item>
              </Col>
              <Col span={6}>
                <Form.Item>
                  <Button htmlType="submit">Create Draft</Button>
                </Form.Item>
              </Col>
            </Row>
          </Form>
        )}
      </CreateDraftMutationComponent>
    )
  }
}

export default NewDraft
The code is very similar to the SignupUser component- we have inputs for title, content, and author email and typing into these fields stores the value in a state which we use as variables in the createDraft mutation when the submit button is pressed.
Note that we are trusting the user to add their email address in the authorEmail field. You would never do this for a real application. You would likely have a user pass a JSON web token (JWT) which would have the user's email encoded inside so that you'd know that you can trust the email you are given. We won't go through how to use JWTs in this example, but this is something that could be added after our application has been completed.
We need to update our index page for a final time to add this NewDraft component.
frontend/pages/index.tsx
import * as React from 'react'
import { NextPage } from 'next'
import Layout from '../components/main-layout'
import FeedList from '../components/feed'
import NewDraft from '../components/new-draft'
import UsersList from '../components/users'
import SignupUser from '../components/signup-user'

const IndexPage: NextPage = () => {
  return (
    <Layout title="Blog Layout">
      <h1>Simple Prisma 2 Blog Example</h1>
      <h3>Create User</h3>
      <SignupUser />
      <h3>Users</h3>
      <UsersList />

      <h3>Create Draft</h3>
      <NewDraft />
      <h3>Feed</h3>
      <FeedList published={true} />
      <h3>Hidden Feed</h3>
      <FeedList published={false} />
    </Layout>
  )
}

export default IndexPage
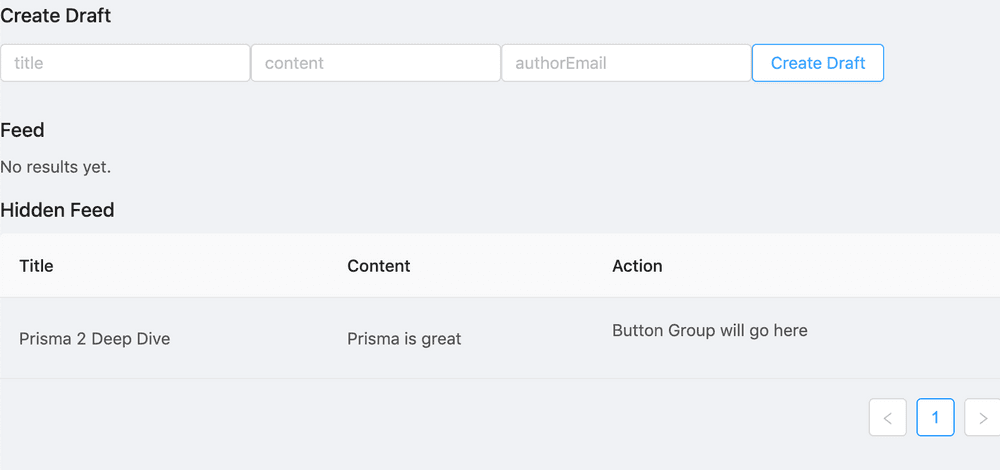
Now go to the Next.js site and you should see that there is the add draft component. Add a new post, making sure to match the email to the user that you have above and submit it.

You should see that it gets added to the drafts feed list.
6. Create a Publish Draft Button Component
Now that we have a draft, let's publish it! We will create a button that will call a publish mutation with a particular post ID as an input parameter. Our backend will call Prisma 2 which will change that post's published field from false to true.
Create a file called publish-draft.tsx and add the following code:
frontend/components/publish-draft.tsx
import React from 'react'
import { Button } from 'antd'
import {
  PublishMutationComponent,
  FeedQueryDocument,
} from '../generated/apollo-components'

type Props = {
  id: string
}

class PublishDraft extends React.Component<Props> {
  render() {
    const { id } = this.props
    return (
      <PublishMutationComponent>
        {publishDraft => (
          <Button
            onClick={() =>
              publishDraft({
                variables: { id },
                refetchQueries: [
                  { query: FeedQueryDocument, variables: { published: true } },
                  { query: FeedQueryDocument, variables: { published: false } },
                ],
              })
            }
          >
            Publish
          </Button>
        )}
      </PublishMutationComponent>
    )
  }
}

export default PublishDraft
We use an auto generated react component just like before and we nest a button inside the PublishMutationComponent component. When the button is clicked, we will call the publish mutation. We have a refetch query here to fetch both published and non published results to ensure that when a post gets published that both lists get updated.
Now we need to update the feed.tsx file to add the PublishDraft to the Action block. Make sure to import the PublishDraft and Button component at the top of the feed.tsx file.
frontend/components/feed.tsx
import { Table, Button } from 'antd'
import PublishDraft from './publish-draft'
// Lines omitted for brevity
//
{
  title: 'Action',
  key: 'action',
  render: ({ id }: { id: string }) => {
    return (
      <Button.Group>
        {published ? null : <PublishDraft id={id} />}
      </Button.Group>
    );
  }
}
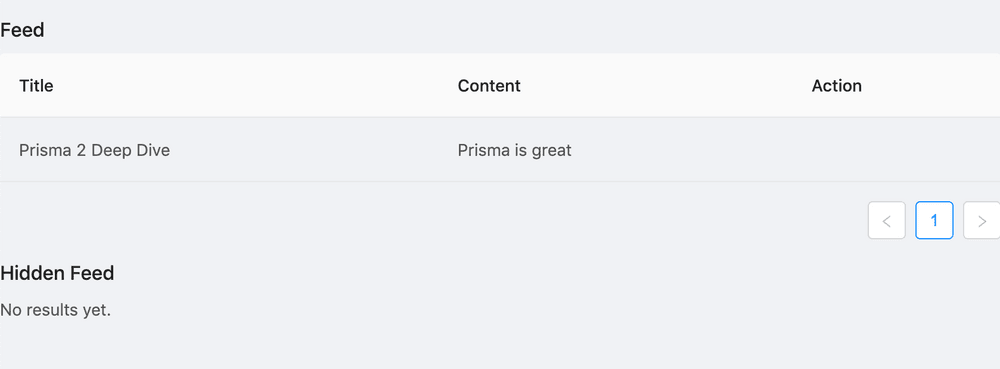
Now when you visit your site, you will see that there is a Publish button next to the post that you created.

Push the publish button and you'll see that it moves from the unpublished to published table. Sweet!
7. Create a Delete Post Button Component
The final component that we have left is to create a delete button for the posts. This button will be very similar to the PublishDraft component that we created. First, create a file called delete-post.tsx and add the following code:
frontend/components/delete-post.tsx
import React from 'react'
import { Button } from 'antd'
import {
  DeleteOnePostComponent,
  FeedQueryDocument,
} from '../generated/apollo-components'

type Props = {
  id: string
}

class DeletePost extends React.Component<Props> {
  render() {
    const { id } = this.props
    return (
      <DeleteOnePostComponent>
        {deleteOnePost => (
          <Button
            type="danger"
            onClick={() =>
              deleteOnePost({
                variables: { id },
                refetchQueries: [
                  { query: FeedQueryDocument, variables: { published: true } },
                  { query: FeedQueryDocument, variables: { published: false } },
                ],
              })
            }
          >
            Delete
          </Button>
        )}
      </DeleteOnePostComponent>
    )
  }
}

export default DeletePost
We are calling the DeleteOnePostComponent component that is autogenerated and we are calling our mutation when the button is clicked. Now that we have the component, we can use it in our FeedList component. Make sure that we import the DeletePost at the top of this file as well.
/frontend/components/feed.tsx
import DeletePost from './delete-post'
// lines omitted for brevity
//
{
  title: 'Action',
  key: 'action',
  render: ({ id }: { id: string }) => {
    return (
      <Button.Group>
        {published ? null : <PublishDraft id={id} />}
        <DeletePost id={id} />
      </Button.Group>
    );
  }
}
Now let's go to our website and we'll see that there is now a delete button. If we press the delete button, it should delete the post.
Before:

After:

So that's it! We've covered all the basics about building a full stack application using Prisma 2 with Next.js in Docker. This configuration is great for development and you shouldn't hesitate to hack on this and build out your own full stack web applications.
Productionize all the things!
For production however, you should make sure to copy your entire code into the docker containers so that you aren't relying on volume mounts for your source code. You'd also likely want to utilize a production ready MySQL instance that has automated backups, scaling, and fault tolerance such as AWS RDS which I've previously discussed how to hook up to Prisma 2. There are numerous other factors to consider when you get to that point though (such as automated deployment with a CI/CD pipeline), but luckily using Docker from the start provides a clear route for productionizing your application in the future.
Video Series for Part III:
Add Main Layout to Next.js
Add Users Component to Next.js
Add Signup User to Next.js
Add Feed Component to Next.js
Add New Blog Draft Component to Next.js
Add Publish Blog Component to Next.js
Add Delete Post Component to Next.js